
Ratings & Reviews
Be the first to review this item
Product Details
Zojirushi BB-HAC10 Home Bakery 1-Pound-Loaf Programmable Mini Breadmaker
Free Shipping+Easy returns

Ratings & Reviews
4.4 out of 5 Based on the opinion of 133 people
Product Details
Bread Lover’s Bread Machine Cookbook:A Master Baker’s 300 Favorite Recipes for Perfect-Every-Time Bread-From Every Kind of Machine
Free Shipping+Easy returns

Ratings & Reviews
Be the first to review this item
Product Details
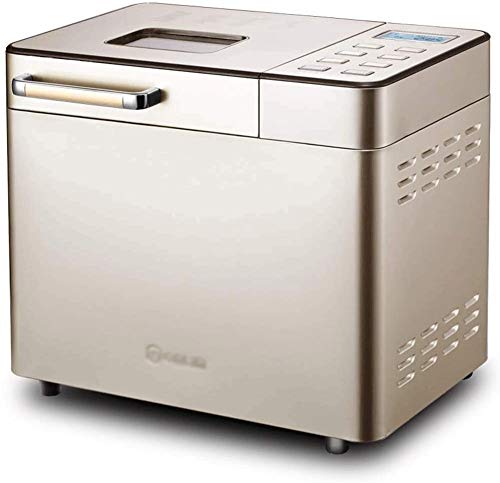
Elitte Automatic Bread Maker Multifunctional Stainless Steel Bread Machine, Programmable, 18 Settings, 3 Crust Colors, Reserve& Keep Warm Set
Free Shipping+Easy returns
Ratings & Reviews
4.4 out of 5 Based on the opinion of 41 people
Product Details
CattleBie Automatic Breadmaker, Home Bread Machine for Kitchen Cooks Professional Bread Maker
Free Shipping+Easy returns

Ratings & Reviews
4.6 out of 5 Based on the opinion of 382 people
Product Details
Multifunctional Programmable Bread Maker, with Led Display and Nonstick Ceramic Pan, for Cake Bread Toast Dough Maker, White
Free Shipping+Easy returns
breads

Many people are unhappy with bread made in a bread machine. I don’t like it either. Here’s 5 Surprising Reasons I Don’t Bake Bread in My Bread Machine.
Bread

Here are some helpful tips for getting the most from your bread machine and the best ingredients to use, along with dozens of bread machine recipes
Bread, Dough, and Sweet Breads

I’ve had a bread machine for as long as I can remember. I love that I can make both dough for homemade bread or pizza AND a loaf of bread! Homemade bread is better for you than store-bought bread and now there are so many options to choose from when you make bread in your … Read More about 10 Best Bread Machines for Homemade Bread
Recipes

A perfect \
Southern Plate Recipes

Bread machine breads

Bread Recipes

Learn To Make Amazing BreadLearn the secrets to make amazing bakery-quality bread with your bread machine! Making homemade bread is so easier than you think, plus you will be so happy enjoying warm homemade bread. I do not bake my bread in the bread machine, I only make the dough in it. I then remove the dough from the bread machine, knead the dough
again and form the loaf, and then let rise. 1. My bread machine has a regular dough cycle and a quick dough cycle. I usually use the quick dough cycle. It also has a rise after mixing the dough. After the rise has completed, I remove the dough from the machine.I use the Zojirushi Bread Machine shown in the photo. I only use the quick dough cycle in making my breads. When the dough is done, I remove it from the bread machine and prepare my bread dough as per the instructions below.Follow the instructions for your bread machine regarding order of loading ingredients. The important thing is to keep the yeast away from the liquid and the salt until the bread-making begins; this is especially important when the machine will not start mixing the dough for several hours.I follow the liquids-first-then-dry method, but instead of putting the sugar and salt on top of the flour, I add them to the liquid. I, personally, recommend placing ingredients in the pan in the following order:Liquid (milk, water)Eggs, oils, melted or softened butterSalt, sugars (including honey, molasses)Dried or powdered milkDried or fresh orange or lemon zest (peel)Dried herbs, dried flavorings, seeds, and nutsWhole wheat flourBread flour or all-purpose flourYeast 2. Adding Ingredients.Water – I usually start out by adding fairly hot water (120 degrees F.) and find that by the time I have added all the other ingredients, the water has cooled to the proper temperature.Butter – Melt or soften butter or margarine in the microwave before adding it to the machine.Eggs – I bring my eggs to room temperature by placing them in a cup of really warm water for several minutes before adding.Refrigerated Ingredients – Heat anything taken from the refrigerator (milk, buttermilk, cottage cheese, etc.) in the microwave until it is warm to the touch, about 1 minute.Salt – Use only non-iodized salt (iodine attacks the yeast activity, slowing down the first fermentation). Salt is a yeast inhibitor and it is best to add it so it is not touching the yeast. If you are having trouble with short loaves, try cutting back on the salt (sometimes this solves the problem). I like to use coarse salt or sea salt in all my bread baking.Other Ingredients – Orange, lemon, or grapefruit peel or zest, as well as cinnamon and alcohol, will have a retarding effect. Too much will stop the yeast activity completely. Cinnamon has a direct effect on the yeast activity and in large quantities it will stop fermentation completely. Keep high percentages of cinnamon out of the dough itself and add it in the fillings where it can have only a limited effect on the yeast activity.Vital Gluten – Add 1 teaspoon of vital gluten per cup of whole grain flour in your recipes. This will produce a taller loaf. If you find the loaves are still short, increase by adding an extra teaspoon until you get the results you desire (be sure to note the amounts on the recipe).Flour – For most breads, you should use bread flour. It has a higher protein content, which forms more gluten during kneading. If you use all-purpose flour, the bread does not rise as high, but it certainly rises. The bread is denser and not as fluffy.Yeast – I use Instant Active Dry Yeast in all my breads. I use 1 teaspoon of instant yeast per cup of flour. If the recipe calls for over 3 cups of flour, I still use only 3 teaspoons. This gives me a taller and well-textured loaf. Sometimes, if the day is warm and humid, I cut back 1/2 teaspoon to prevent over proofing. The rapid dough cycle is the only cycle I use on my bread machine. Store your yeast in the refrigerator for a longer life. 3. The most important hint or tip. Learn to read your dough. Do not be afraid to open the lid to check how your dough is doing. It should form a nice elastic ball. If you think the dough is too moist, add flour, a tablespoon at a time. The same is true if the dough is looking dry and gnarly. Add warm water, a tablespoon at a time. If you can not judge your dough by looking, stick your finger in and feel the dough. It should be slightly tacky to the touch. 4. Another secret is not to always flour the surface on which you form the dough (unless you have a very sticky dough).Instead, lightly oil the work surface to prevent the dough from sticking. It is often the case that one uses too much flour on the work surface and, since dough that has risen will not accept any more flour, the excess flour used on the work surface just toughens the bread. I spray lightly in one spot and use my hands to spread it over the entire work surface. It is a sure bet that oiling your work surface will produce wonderful rolls and loaves of bread.To oil the surface, you can either use oil or a nonstick cooking spray. If you wish, flavored oils may also be used, provided they are compatible with your bread. The nonstick cooking sprays should be used carefully, since it is easy to spray them unevenly. 5. I knead the dough just a little on the sprayed surface and form into a oval, cover with plastic wrap or a cotton towel, and let rest for 10 minutes. This is an important step to let the dough rest after turning it out of the bread pan. This is called \
